STENCIL
CHAIR
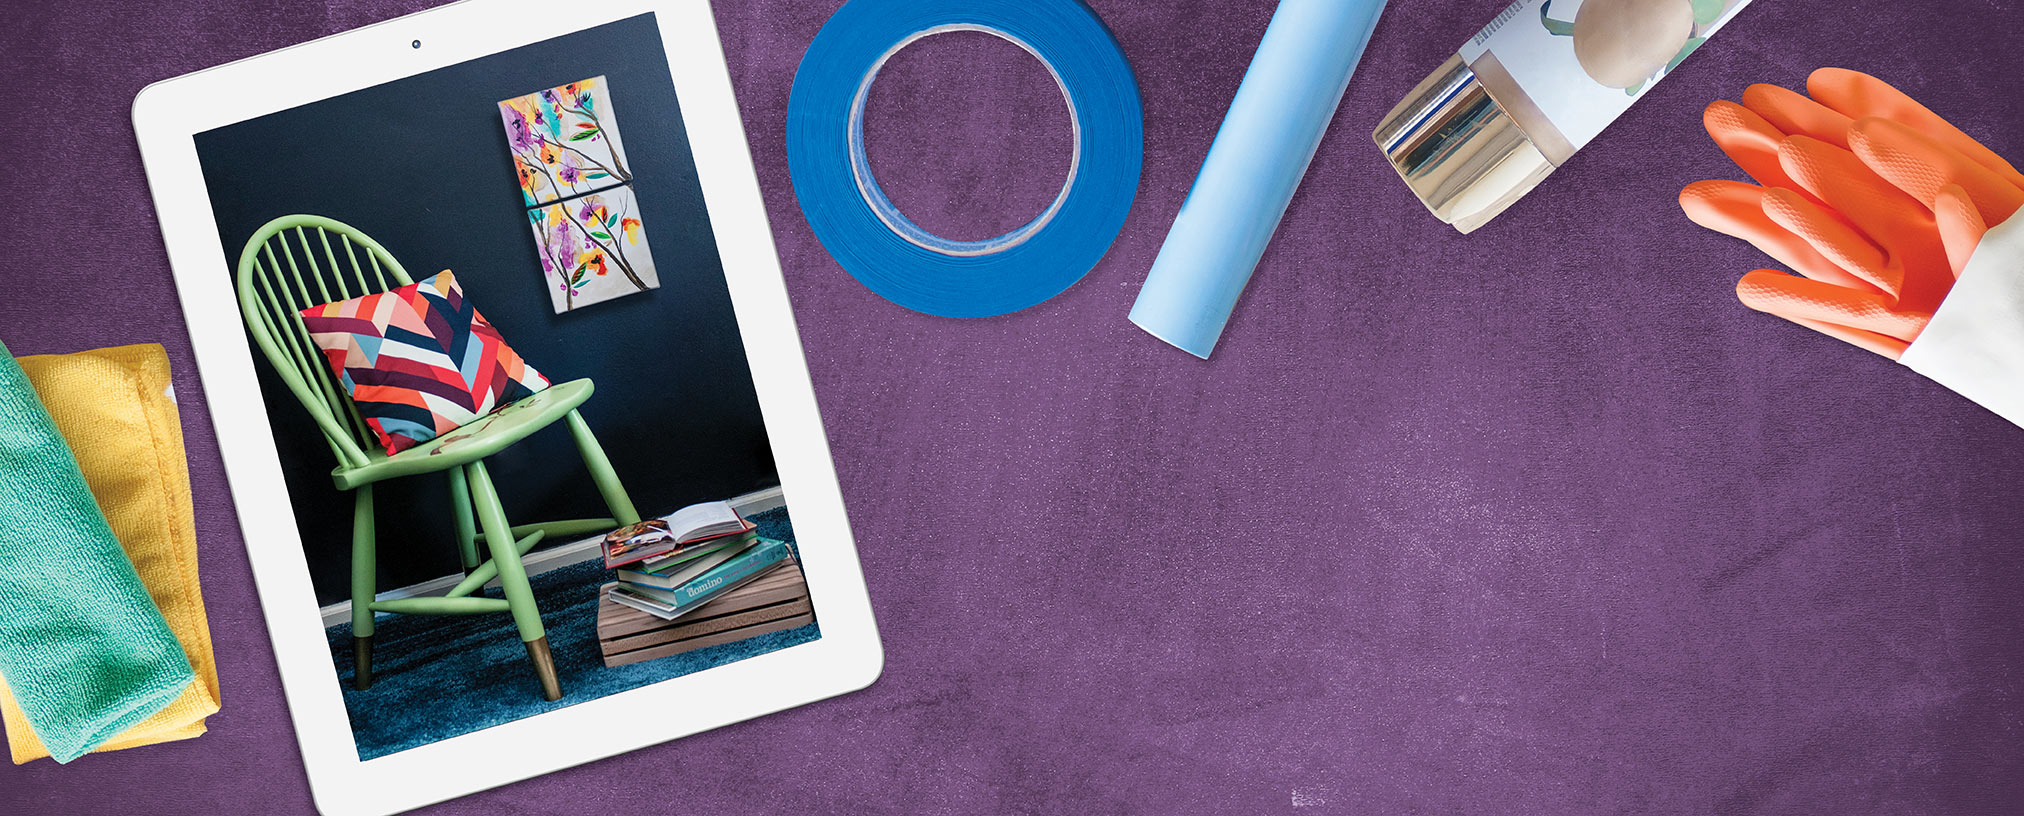
This chair makeover is super easy and you can get a lot of different looks out of it, depending on your chair style and paint colors. We went for a sweet, crafty style and used our wall art to help define the overall look.
DIY STENCIL CHAIR SUPPLIES LIST
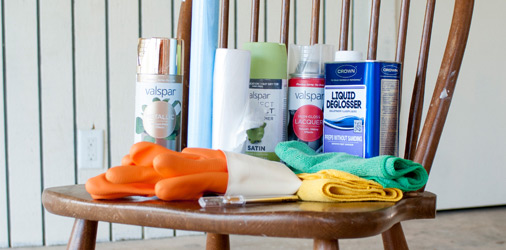
Here are the supplies we used:
• Old wooden chair
• Microfiber towels
• Rubber gloves
• Liquid deglosser
• Metallic gold spray paint
• Pastel satin finish paint + primer spray paint in your favorite color (we used Valspar Project Perfect in Everglade Glen)
• Painter’s tape
• Plastic disposable drop cloths
• 1-2 sq. ft. of adhesive stencil film
• Scrap cardboard or matboard
• Sharp craft knife
• Permanent pens or markers
• Optional: Clear gloss lacquer spray
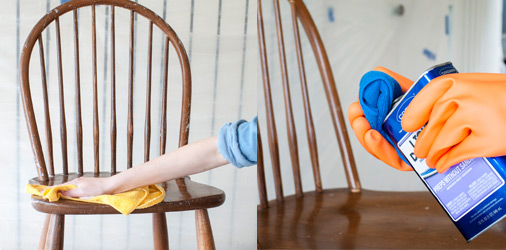
1. PREP YOUR MATERIALS
Cover your work area in drop cloths. Wipe the chair clean with a damp cloth or with warm soapy water if it’s dirty or dusty. If it’s stained or painted with a glossy coating, you’ll need to use a liquid deglosser to prepare it. Don the rubber gloves, apply the deglosser liberally to a microfiber towel and use firm pressure to scrub the entire surface of the chair. Be sure to cover every inch, or you’ll have spotty areas on the finished product.
Pro Tip: If the chair still looks glossy after your first application, repeat the process to remove any remaining stain.
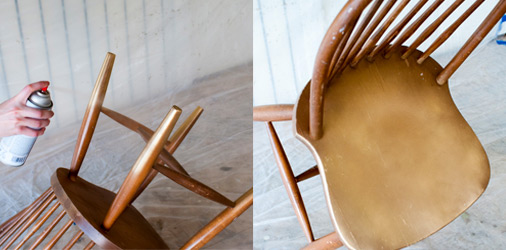
2. GET YOUR GOLD ON
When the chair is clean, deglossed and dry, spray an even coat of metallic gold spray paint to the seat of the chair and bottom 5-6 inches of the legs. Allow at least 1 hour to dry.
Pro Tip: Turn the chair upside down to ensure an even, full-coverage coat on the legs. Walk around the entire chair while spraying.
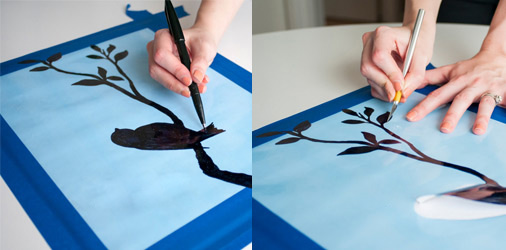
3. DESIGN YOUR STENCIL
Using painter’s tape, secure a sheet of adhesive stencil film to a table. Layer cardboard or matboard underneath to protect your table! Draw your desired stencil design with permanent pen, then carefully cut the design out with a craft knife. When your stencil is complete, peel and stick it to the seat of the chair.
Pro Tip: If you want an intricate design, monogram letters or just an easy shortcut, buy a pre-made adhesive stencil instead of creating one yourself.
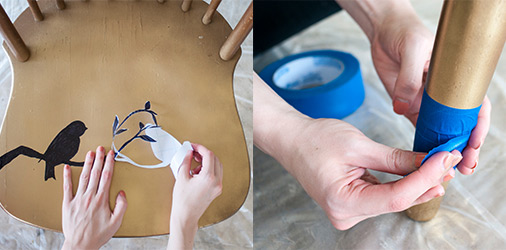
4. WRAP THE LEGS
To make sure you keep those gold-tipped legs, wrap painter’s tape around each leg about 4 inches up from the bottom.
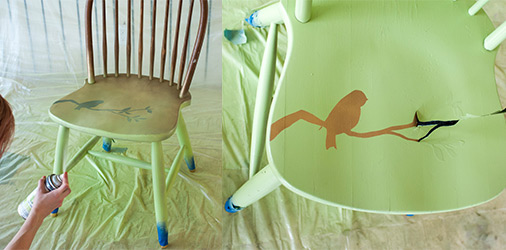
5. SPRAY PAINT COLOR
Now that your stencil is applied and the legs are taped off, spray paint the entire chair with your desired color. Use long, linear motions to create a solid and even coat. Don’t forget the back, sides and undersides of each surface. Carefully remove your stencil and tape before the paint dries completely to avoid permanent sticking. Allow paint to dry for 8-24 hours before handling or moving.
Pro Tip: Add an optional coat of clear lacquer to seal in color and seal out moisture.
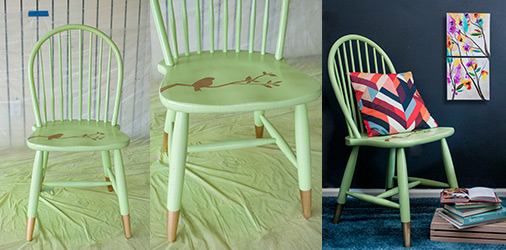
STYLING TIPS
The pastel and metallic combo is a wonderful conversation piece in a dark room or against an accent wall. Try painting a set of 4 or 6 of these for truly unique dining room seating, or use a single chair as an accent in a bedroom or entryway.
Pair with a brightly colored throw pillow and a stack of books for a cozy reading nook near a window. This chair is versatile enough to be moved around the home and utilized in many ways over the years.